Friday, 24 February 2023

Linux utilities

The strace program prints all the system calls made by a program.

strace ls -lhn $(which sleep) 2>&1 | grep passwd

What you are trying to see is whether ls command is trying to read the /etc/passwd file or not.

Networking tools:

Performance tools:


Pe


Sunday, 5 February 2023

Fine Offset WH1080 Weather Station and a Raspberry Pi

To receive the weather readings from a WH1080 by radio, you can use a SDR USB with a Raspberry Pi 3/4, however it will not work with a Raspberry Pi as it is's power requirements are too high. The SDR USBs draw considerable current from the USB port as they are powering the amplifier.

The appeal of using a Pi Zero is it's low power usage - it is approximately 0.7W (120mA) compare to a Pi 4's 5.1W (1010mA).

So we need another radio receiver. The RFM01 and RFM12b are candidates, and this article describes using them with a Raspberry Pi.

My weather station transmits data on 868Mhz, using Frequency Shift Keying (FSK). This is where a digital '1' is transmitted at one frequency and the '0' at another.

Video: 433Mhz with the Pi

Code for controlling the RFM01 with SPI on the Pi.


Wednesday, 11 January 2023

z80 ZX Spectrum assembler and emulator tools


Download tools

  • Visual Studio Code – Editor, with the following extensions:
    • Z80 Assembly 0.0.3 by Imanolea
    • DeZog 2.2.3 by Maziac (this is a renamed update to Z80 Debugger 0.9.1, also by Maziac)
  • ZEsarUX 10.1 – Emulator
  • sjasmplus 1.18,2 – Z80 compiler
A comparison of the debugger compatibilities are here.

Add launch.json to your workspace's .vscode folder:
{
    // Use IntelliSense to learn about possible attributes.
    // Hover to view descriptions of existing attributes.
    // For more information, visit: https://go.microsoft.com/fwlink/?linkid=830387
    "version": "0.2.0",
    "configurations": [
        {
            "type": "dezog",
            "request": "launch",
            "name": "Z80 Debugger",
            "remoteType": "zrcp",
            "zrcp": {
                "hostname": "localhost",
                "port": 10000,
                "skipInterrupt": false
            },
//          "topOfStack": "Stack_Top",
            "rootFolder": "${fileDirname}",
            "sjasmplus": [
              {
                  "path": "${fileDirname}/${fileBasenameNoExtension}.sld",
                  "useFiles": true,
                  "asm": "sjasmplus",
                  "mainFile": "${fileDirname}/${fileBasenameNoExtension}.z80"
              }
            ],
            "disassemblerArgs": {
                "esxdosRst": true
            },
            "load": "${fileDirname}/${fileBasenameNoExtension}.sna",
            "startAutomatically": false,
            "preLaunchTask": "sjasmplus"
        }
    ]
}
Add tasks.json to the same folder:
  {
    // See https://go.microsoft.com/fwlink/?LinkId=733558
    // for the documentation about the tasks.json format
    "version": "2.0.0",
    "tasks": [
                {
            "label": "sjasmplus",
            "type": "shell",
            "command": "sjasmplus", 
            "args": [
                "--fullpath",
                "--sld=${fileDirname}/${fileBasenameNoExtension}.sld",
                "${file}"
            ],
            "group": {
                "kind": "build",
                "isDefault": true
            }
        }
    ]
}
  
To launch zesarux automatically, see this article.

Download zesarux for Windows (or it's Linux alternative - remember to include lib-spectrum). The source code is here.

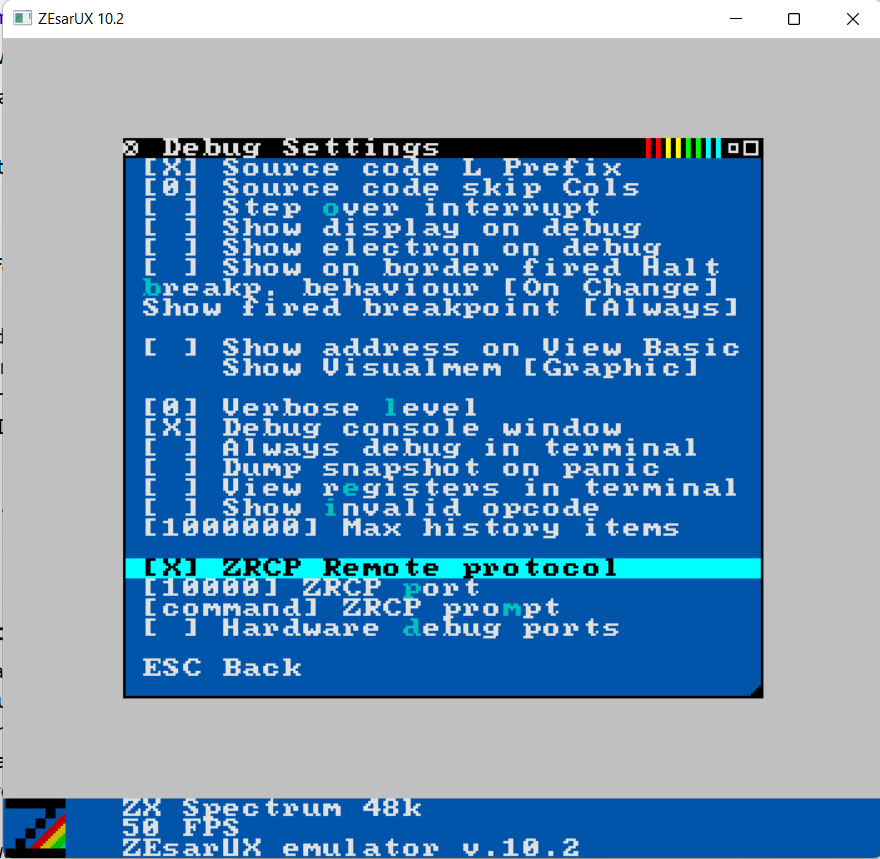
Start zesarux
Set up zesarux remote debugging


Or start it with the following command-line parameters:
"C:\Program Files\ZEsarUX_win-X\zesarux.exe" --disablefooter --zoomx 2 --zoomy 2 --disable-all-first-aid --quickexit --advancedmenus --enable-remoteprotocol --nosplash --nowelcomemessage

(the command-line parameters can be found here).

Select the .z80 file

Compile and Debug
Terminal > Run Task > sjasmplus
Run > Start Debugging


Another way to do this is to start ZESarUX using build tasks in VSCode.

Wednesday, 4 January 2023

FreeBSD find files commands

Recursively find files in folder

find .//. ! -name . -print | grep -c //

Count of directories

find . -type d | wc -l

Count of directories (depth 1)

find . -maxdepth 1 -type d | wc -l

Count of files (depth 1)

find . -maxdepth 1 -type f | wc -l

Delete files that are called Zone.Identifier

find . -name "*:Zone.Identifier" -type f -delete

https://www.freebsd.org/cgi/man.cgi?query=find&apropos=0&sektion=1&manpath=FreeBSD+7.3-RELEASE&arch=default&format=html

Monday, 26 December 2022

Replacing a disk on FreeNAS

The documentation for the older FreeNAS server is slowly disappearing from the Internet. Thank you to the blog post on this link for instructions on how to rebuild a FreeNAS RAID.

If you have a degraded RAID 1 array in FreeNAS you may need to replace the disk and trigger the rebuild on your NAS device. Thankfully it is really easy to repair broken raid in FreeNAS.

If you go to disk > software raid and click on tools you can send commands and if you send the status command you will see that your RAID 1 is marked degraded.


You can also see which disk is still running so that you know which disk to remove, the next step is to forget the broken disk. All you need to do is use the forget command.


Once you have done this you can insert your new disk into the array and the rebuild should start automatically, it may take some time to rebuild a RAID 1 array.


A few hours later you will have fixed a degraded RAID 1 array which you can once again confirm by running the status or list command in the freenas GUI. The FreeNAS RAID is pretty user friendly in this regard since you can remove and add disks easily and have a raid rebuild running in a matter of seconds. 

Wednesday, 23 November 2022

Running multiple identities on GitHub on Windows


You can run multiple identities on GitHub, by putting a copy of the two files

id_ed25519 and id_ed25519.pub 

in the 

C:\Users\<username>\.ssh 

directory.

It is worth creating two subfolders

C:\Users\<username>\.ssh\user1 and

C:\Users\<username>\.ssh\user2

to keep the original copies of the keys and copy them into the parent folder as required.

If you try and clone a GitHub repo under the wrong user, than isn't permissioned, then you will get the error:

Cloning into 'myrepo'...

remote: Repository not found.

fatal: repository 'https://github.com/myteam/myrepo.git/' not found